

Are you generally good with technology and often end up playing the role of ‘tech support’ for your friends and family? If that is the case then you could make your life a lot easier if you were able to create video guides and tutorials that show them exactly what to do, or even capture bug reports and demos directly from your screen.
To do all that, you will need to be able to record video footage from your PC screen – which is also known as a desktop screencast. That is where Movavi Screen Capture Studio will be a big help, as it can act as a desktop recording software and help you capture exactly the footage that you need.
In fact Movavi Screen Capture Studio is so easy to use that you can get started right now. Just launch the software and follow these steps to begin recording:
- Select ‘Record screen’ in the main menu.
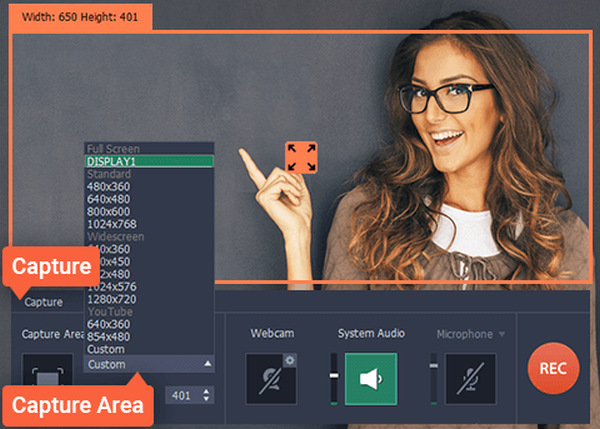
- Define the capture area by drawing a frame on-screen using the mouse cursor, using the presets in the list under ‘Capture Area’ or selecting a window on your PC that you want to record.
- If you want to capture keyboard and mouse actions, you could open up the ‘Capture’ menu and select to display keyboard actions on-screen, highlight the mouse cursor, or even set a custom ‘click’ sound that is more audible.
- Select the audio source that you want to record by highlighting the ‘System Audio’ or ‘Microphone’ icon depending on whether you want to record audio from your speakers or a voiceover from a microphone respectively (or both).
- Click ‘REC’ when you are ready and the recording will begin after 5 seconds.
- Click ‘Stop’ when you are done.
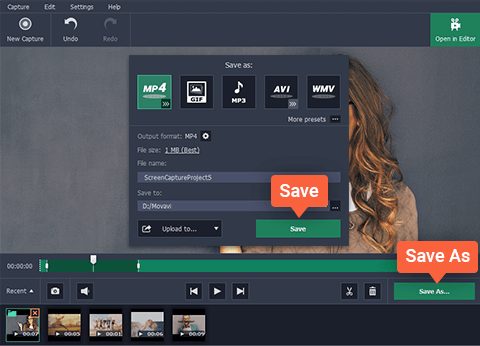
- Click ‘Save as’ to save the video immediately, or ‘Open in Editor’ to edit it before you do.
Assuming you choose to edit your video using Movavi Screen Capture Studio, there’ll be a lot that you can improve. It has a comprehensive set of editing features that will let you cut and join video segments, apply special effects or filters, enhance the video quality, insert audio tracks, fix common issues, add customizable captions, and much more.
Between these features as well as the control that Movavi Screen Capture Studio gives you over your recording parameters, you should be able to create a great video guide. In fact you could even make it look professional enough that you may want to consider sharing it online by uploading it to YouTube or publishing it on your own blog. Who knows – it may even be the start of a nice little side project.
Article Submitted By Community Writer